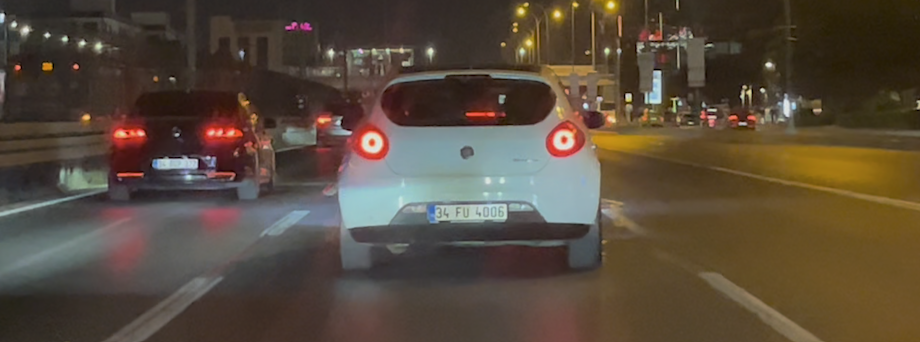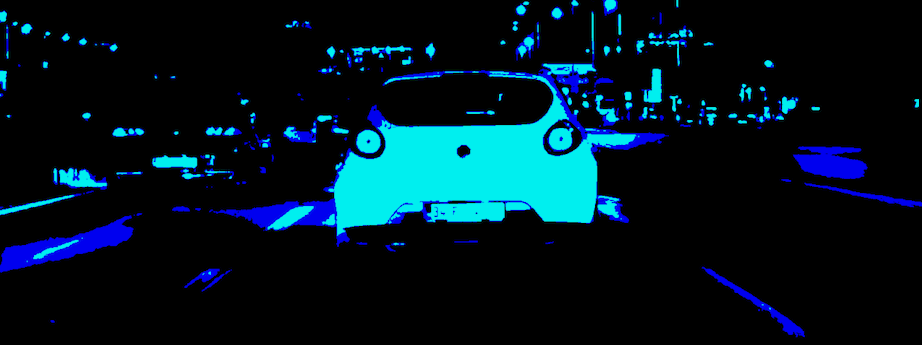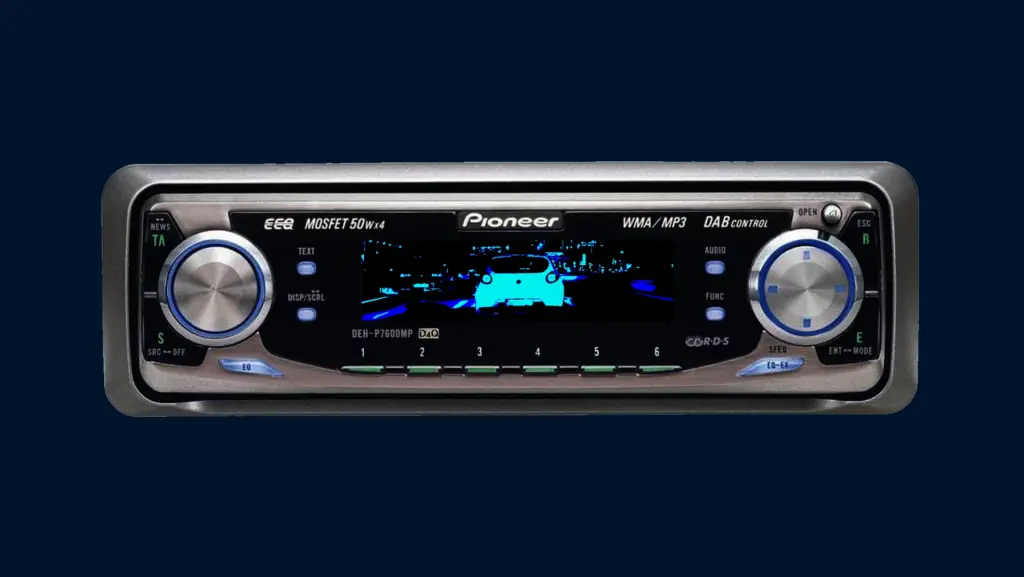

The classic Pioneer Carrozzeria car audio systems featured iconic, high-contrast, retro-digital visualizers on their displays. Recreating this aesthetic for a music video or audio visualizer is a fun project that can be easily accomplished in non-linear editing software like Adobe Premiere Pro. Based on the provided project screenshots, here is a step-by-step guide to achieving this specific stylized look.
1. Project and Sequence Setup
Start by creating a new sequence with a custom resolution. The classic ultra-wide head unit display ratio is key to selling the effect. Set your sequence resolution to 1280×486.
Import your media, which should include:
-
Your music track. Like Bass Can You Hear Me?
-
Background video footage (nighttime driving footage works exceptionally well for this, as seen in the raw footage “Ekran görüntüsü 2026-09-22 224144.jpg”).
-
Any overlay graphics, such as the classic Pioneer logo.
2. Timeline Arrangement
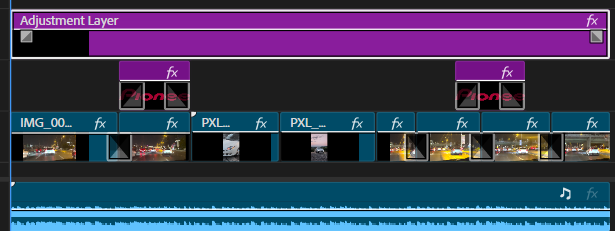
Construct your timeline as follows:
-
Audio Track: Place your music track on the primary audio layer.
-
Video Track 1: Lay down your driving footage clips sequentially.
-
Video Track 2: Place your logo overlays (e.g., the Pioneer text) above the specific clips where you want them to appear.
-
Top Track (Adjustment Layer): Create an Adjustment Layer and drag it across the entire length of your sequence on the highest track. Applying the effects to this layer ensures a uniform, continuous visualizer look across all the disparate clips underneath.
3. Applying the Effects Stack
To transform the standard night driving footage into the stylized, duotone digital display, you will need to add a specific stack of effects to the Adjustment Layer. The order and values are crucial for getting the correct thresholded look.
Apply the following effects to the Adjustment Layer in your Effects Control panel:
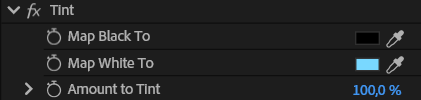
A. Tint This effect remaps the color values of the footage to our desired duotone palette.
-
Map Black To: Black (
#000000) -
Map White To: Light Blue (a cyan/neon blue shade)
-
Amount to Tint: 100.0%
B. Brightness & Contrast (First Instance) This initial adjustment pushes the contrast hard to start separating the darks from the lights.
-
Brightness: 8.0
-
Contrast: 90.0

C. Posterize This is the most important effect for the “retro digital” feel. It aggressively reduces the number of color bands, creating a chunky, simplified image.
-
Level: 2

D. Brightness & Contrast (Second Instance) A final, extreme contrast push forces the posterized bands into sharp, solid blocks of color, eliminating any remaining smooth gradients.
-
Brightness: 95.0
-
Contrast: 100.0

The Final Result
By combining the ultra-wide 1280×486 aspect ratio with this aggressive stack of Tint, Posterize, and double Brightness/Contrast adjustments, your standard driving video will be perfectly transformed into a chunky, high-contrast cyan and black animation reminiscent of a vintage Carrozzeria DSP equalizer display. Simply render the sequence to complete your retro audio visualizer.